Let’s say you have a drone project which includes collecting data from some sensors not provided by DJI. eg. air quality, temperature, humidity, etc. Of course, it would be easy to strap the sensor package on the drone and record blindly. However, there are times when it is useful to have the ability to: transmit the collected data, timestamp/location-stamp the data, or to send commands to the drone based on a sensor’s reading. Onboard SDK allows you to do that, however it can be difficult to setup if you are not familiar with Linux or Raspberry Pi’s.
My Setup:
- DJI Matrice 100
- Raspberry Pi Zero w/Raspbian installed (Any model)
- Ubuntu 16.04
- A computer with Windows (only need to enable API access)
Configuring the Pi:
The pi out of the box won’t be able to communicate with the drone over serial. So we configure that, starting with a clean install of Raspbian:
Enabling serial access:
From the terminal: sudo raspi-config go to peripheral access and enable serial communication. Then sudo nano /boot/cmdline.txt Here we change the following line from: dwc_otg.lpm_enable=0 console=ttyAMA0,115200 kgdboc=ttyAMA0,115200 console=tty1 root=/dev/mmcblk0p2 rootfstype=ext4 elevator=deadline rootwait to: dwc_otg.lpm_enable=0 console=tty1 root=/dev/mmcblk0p2 rootfstype=ext4 elevator=deadline rootwait
This will make the drone available over /dev/tty/AMA0 Finally, we set the baud rate to 230400 by adding lines to the end of /boot/config.txt: sudo nano /boot/config.txt add these lines at the bottom: enable_uart=1 init_uart_clock=64000000
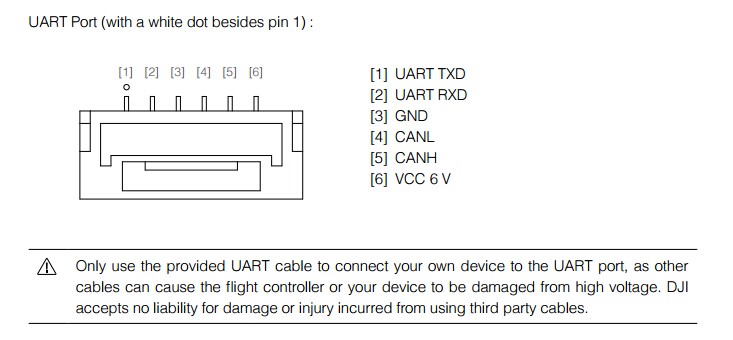

We’ll be using serial communication between the drone and our pi. Therefore, we’ll need to use:
- Pin 08 (TX) –> Drone RX pin
- Pin 10 (RX) –> Drone TX pin
- Pin 06 (GND)
This should be the easy part, just be sure that the RX & TX pins aren’t switched.
Installing OSDK:
git clone https://github.com/dji-sdk/Onboard-SDKcd Onboard-SDKmkdir buildcd buildcmake ..makecp ../sample/linux/common/UserConfig.txt bin/cd binsudo nano UserConfig.txt
Edit UserConfig.txt by replacing the appropriate values for the app ID and key.
Enabling DJI API access:
Register an app for DJI OSDK on DJI’s developer site. Create a new app in order to get the API keys. After doing so, download DJI Assistant 2 on a Windows machine. Connect the computer to the micro-usb port on the drone. Run the program and navigate to preferences to enable API access. No need for the Windows machine now, unless you want to use the simulation it provides during development.
Before running the example:
- Turn on the drone
- Turn on the receiver/connected mobile device
- Ensure the mobile device is connected to the internet or errors may occur when the servers attempt to validate your API keys
Run an example:
Now we can run a sample app that was written by DJI. Let’s use the telemetry example that provides us with the following sensor data:
- Flight Status at 1 Hz
- Fused Lat/Lon at 10Hz
- Fused Altitude at 10Hz
- RC Channels at 50 Hz
- Velocity at 50 Hz
- Quaternion at 200 Hz
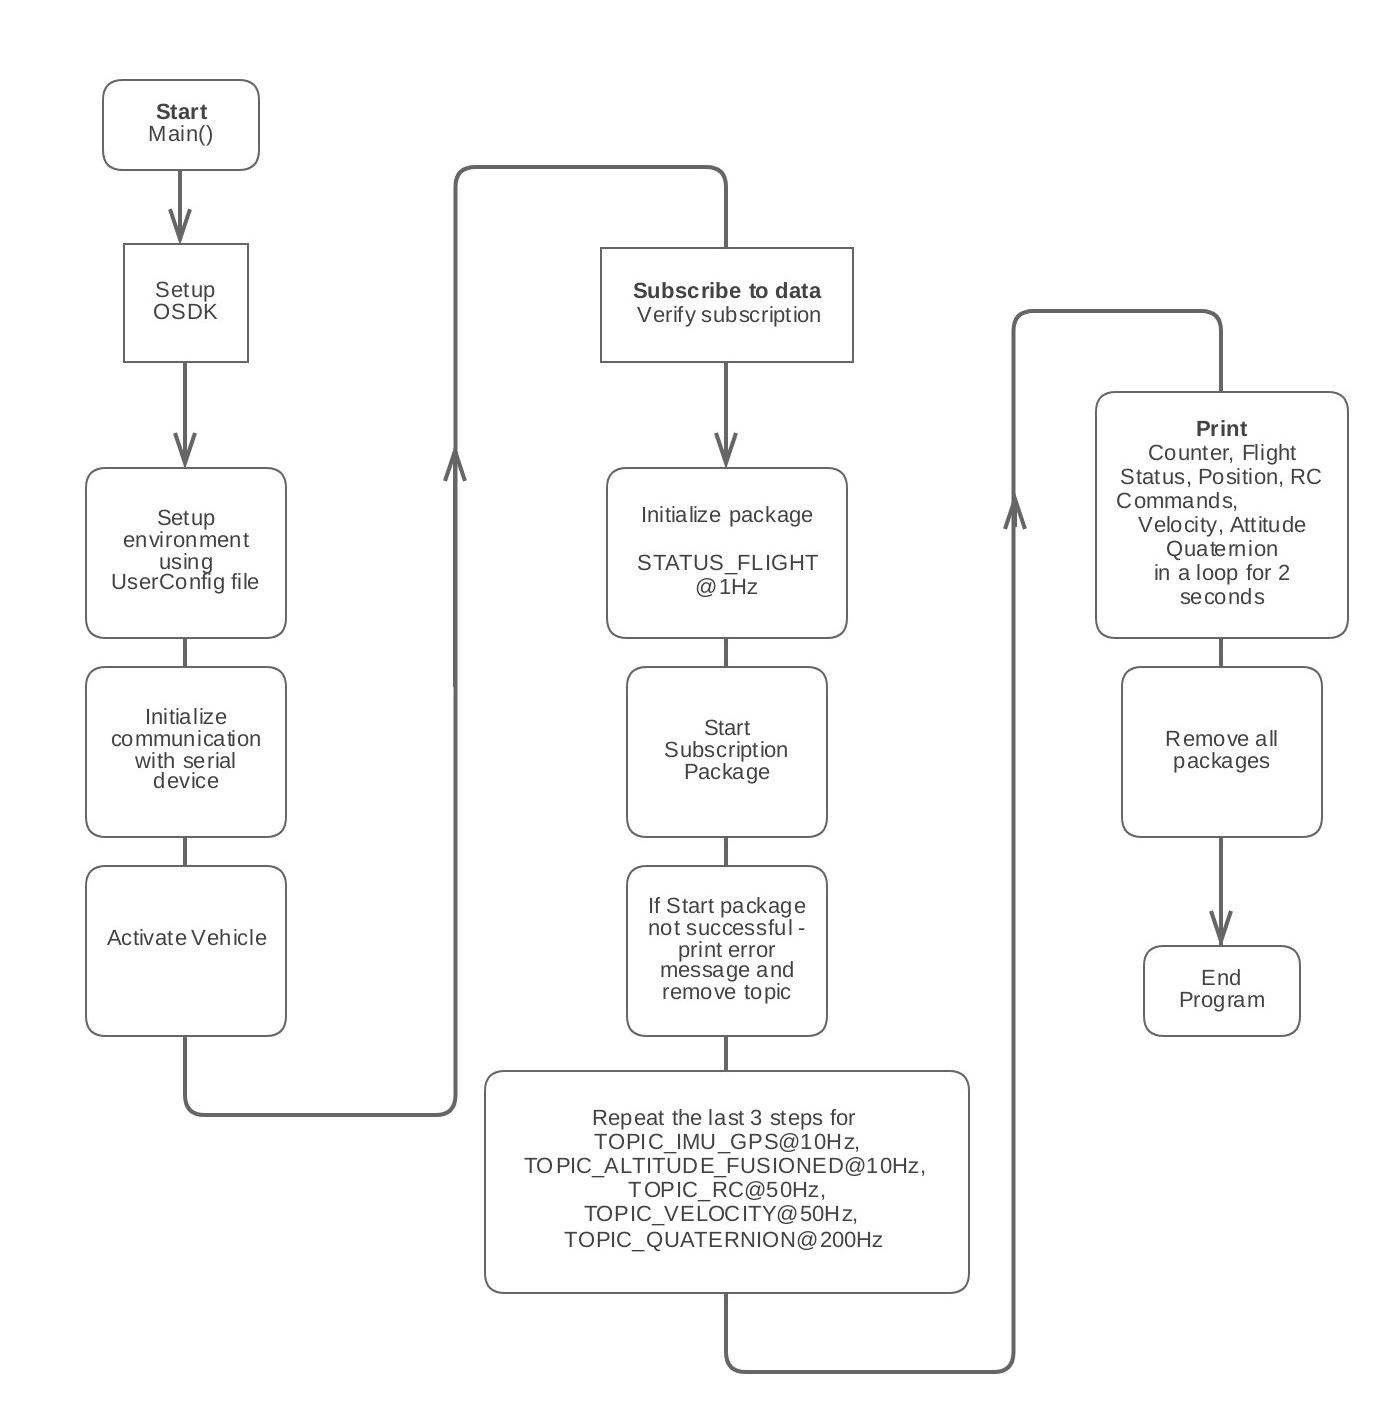
The workflow for this example follows this flowchart:
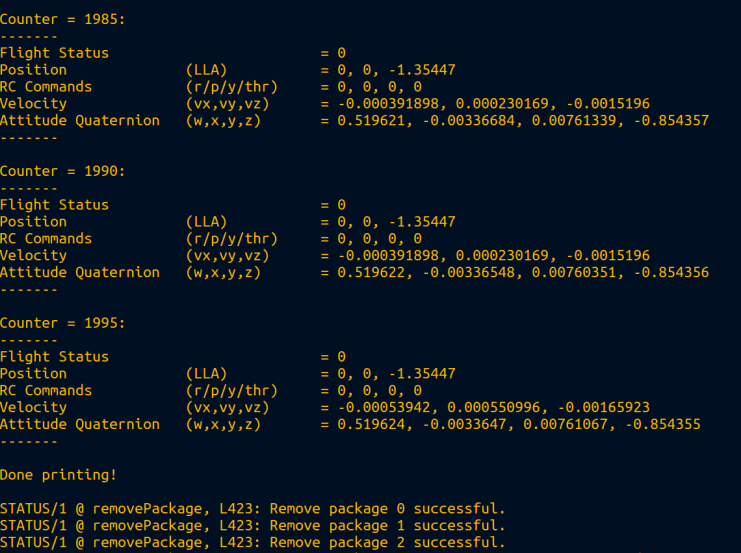
Run the code with ./djiosdk-telemetry-sample UserConfig.txt. If everything is setup properly the output should look like this in your terminal:
As I continue to work on this, I’ll be making another post soon about how to write this and other sensory data to a .csv file! If you have any questions, please do not hesitate to ask. My email is jamesthesken@gmail.com